How to create a new connection in Calenderio
Published under Guides on Mar 06, 2022
Connections in Calenderio
Calenderio uses connections to send events from Calendar A to Calendar B. Each connection that is created is a one-way sync between the source calendar (Calendar A) and the destination calendar (Calendar B). In order to create a two-way sync, we need to create a second connection in the opposite direction.
After creating a connection, Calenderio will do a background sync to sync existing events from Calendar A to Calendar B. From that point forward, calendar events will be synced in real-time between the calendars.
Plan out your connection
Before we get started with creating a new connection, we should take a minute to think about how we want to structure our connection. Decide which calendar is the source calendar and which is the destination calendar, and which customization options you'll be using. If you'll be creating multiple connections, consider if you want to use Connection Chaining for your connections.
Authenticating accounts
The first step we'll need to take is to authenticate our calendar accounts. Depending on what calendars you're connecting, you may need to go through this step twice if you're connecting two different calendar accounts.
We have an article dedicated to authenticating your accounts, which you can read here: How to Authenticate a Calendar Account with Calenderio. In summary, you need to:
- Head to the Accounts page.
- Click on the "Add a new account" button.
- You'll be redirected to Cronofy, our calendar partner. Connect your desired account with Cronofy by granting access to Cronofy.
- You'll then be redirected back to the Calenderio Accounts page, where you'll see your newly connected account and its attached calendars.
Once you've authenticated the accounts you want to connect, we can move on to creating the connection.
Creating the connection
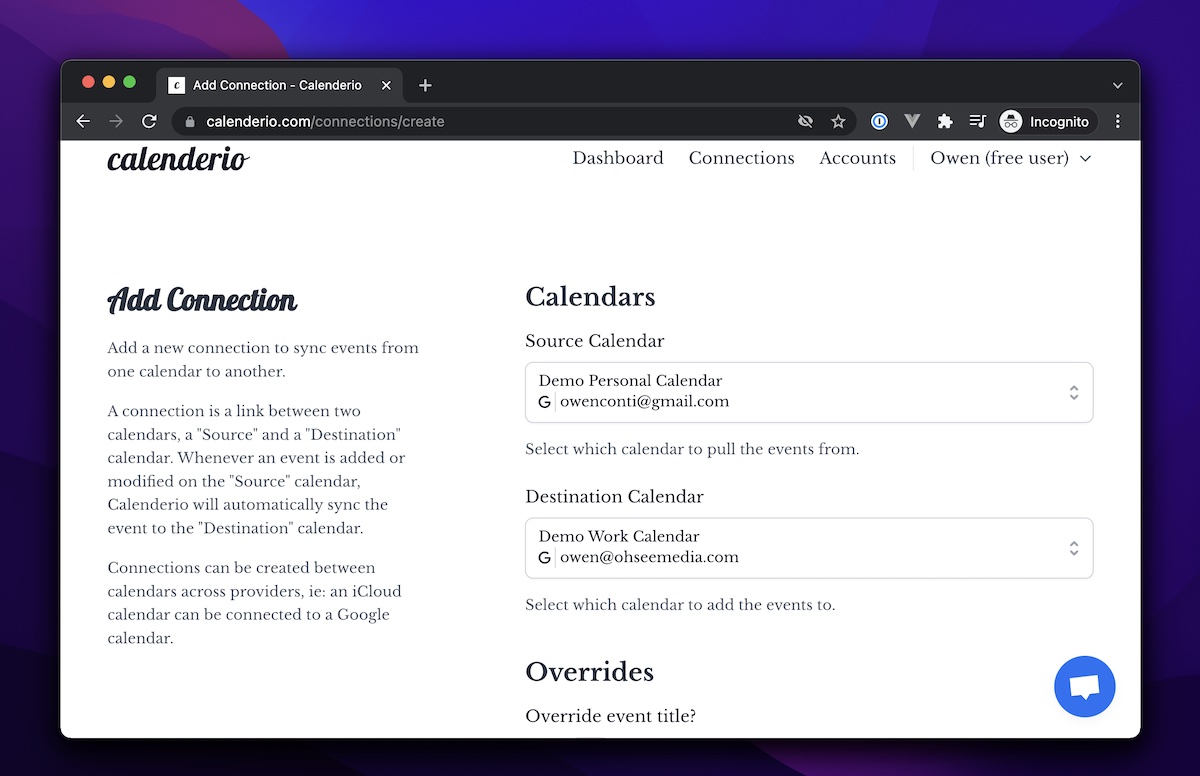
Next, we can head to the Connections page to create our new connection. Click the "Add a new connection" button to get to the Add Connection form.
The Add Connection form has a series of steps which involve:
- Selecting the two calendars you wish to sync
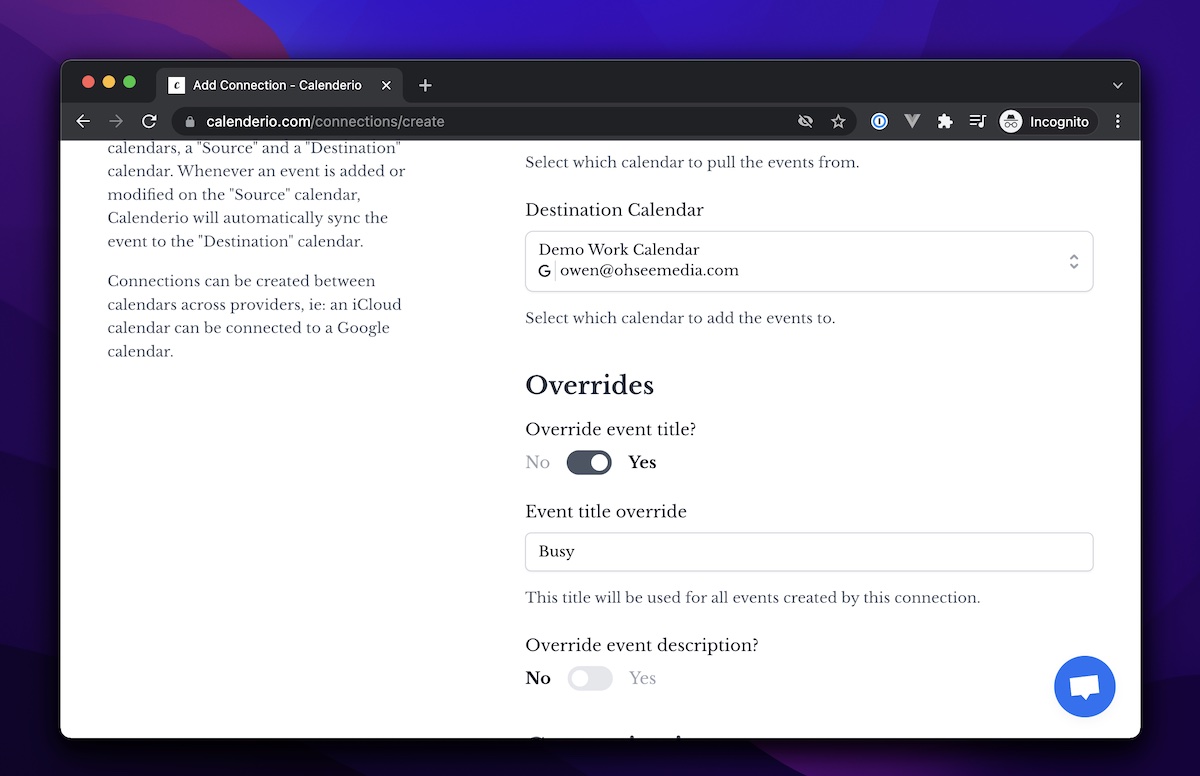
- Optionally providing override values for title and description
- Configuring a couple connection settings
Under "Source Calendar", choose the calendar you'd like to pull events from. Under "Destination Calendar", choose the calendar you'd like to push events to. The form should now look like this:
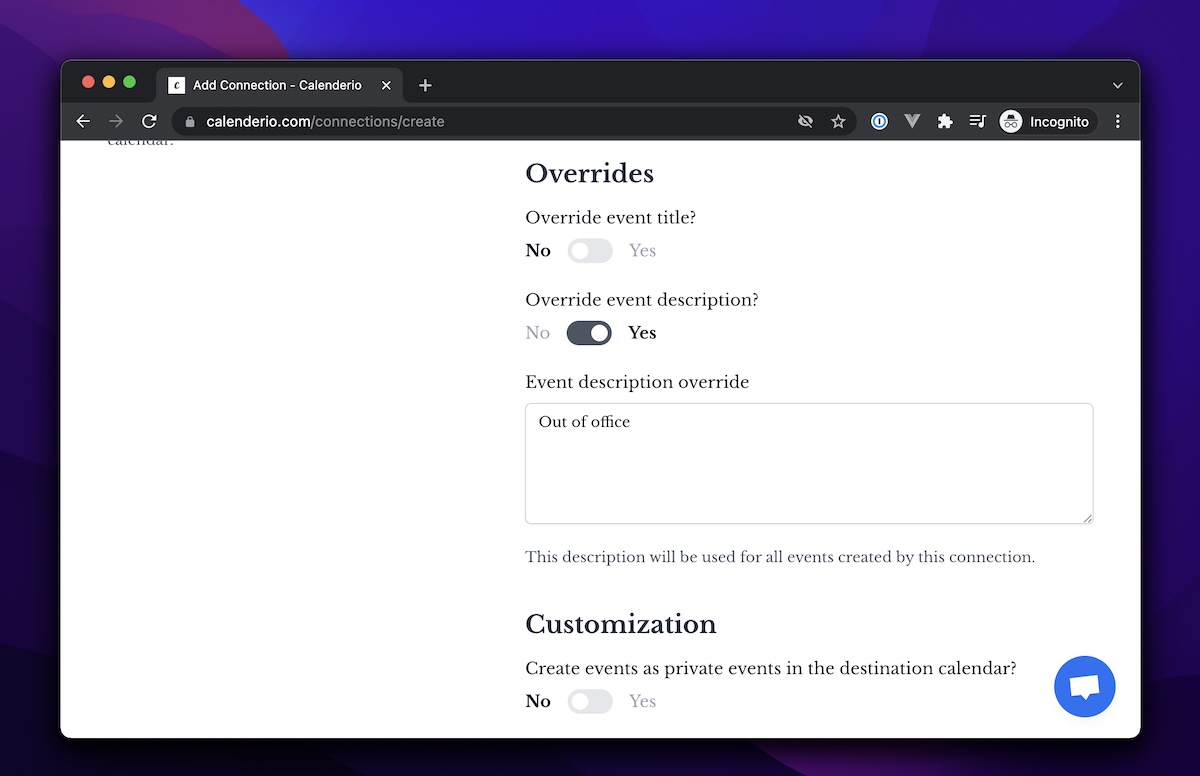
After that, we can set our title and description overrides. Flip the toggle for each of these to Yes, and then enter in your desired override. What you enter into these text fields is what Calenderio will use as the title and description of the event in your work calendar. If you want the original event title and description to be synced to the destination calendar, then you should leave these override toggles off.
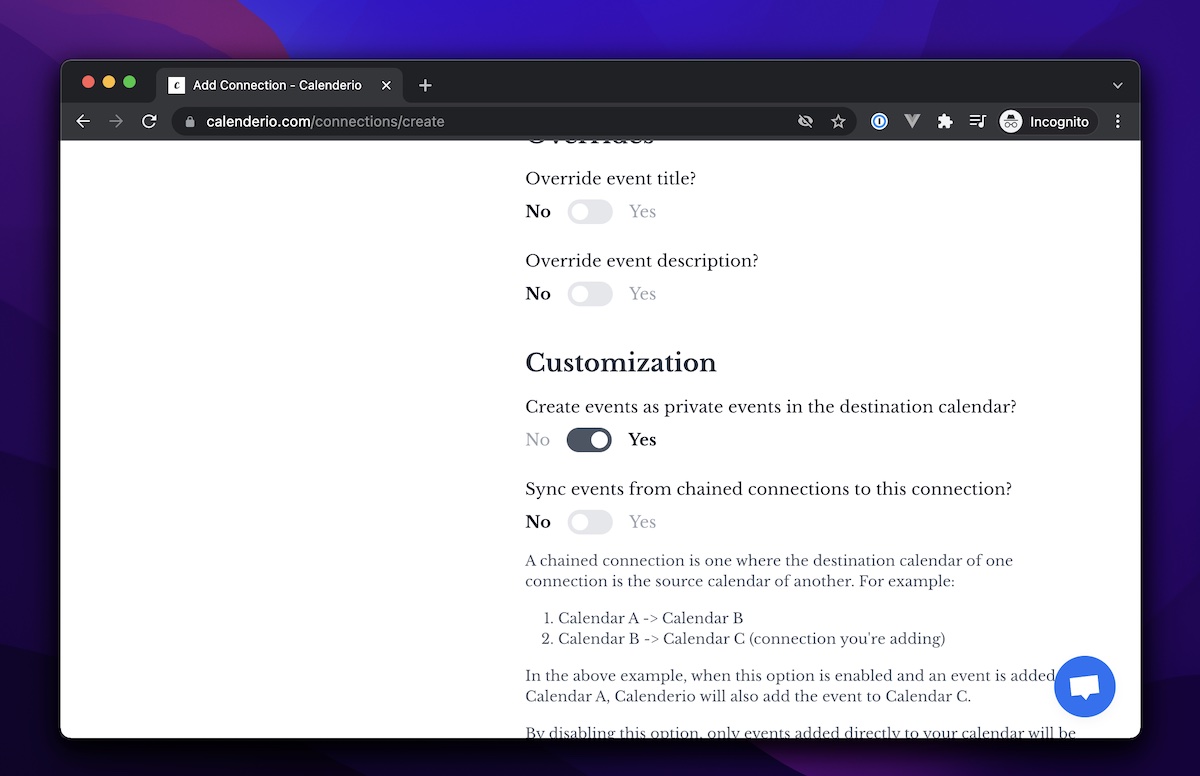
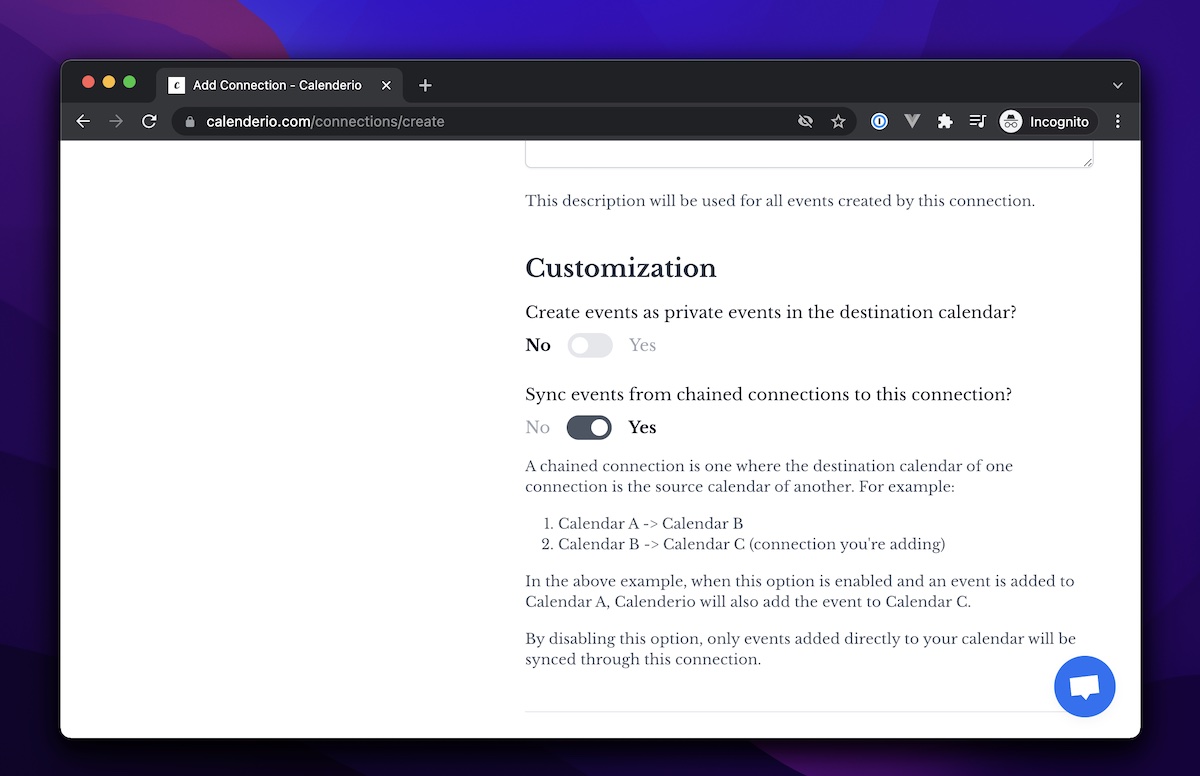
The next setting to configure is for controlling if the event should be marked as private. If you'd like the event to be private (meaning only you can view the event details), then you should flip the "Create events as private events in the destination calendar" toggle to Yes.
The final setting to configure is the "Sync events from chained connections to this connection?" setting. This setting controls whether or not we want this connection included in a connection chain.
When this is enabled, Calenderio will sync events from connections where the destination calendar is the same calendar as this connection's source calendar. You'll want to turn this off if you only want this connection to sync events that were not added by Calenderio.
All set!
Once you've finished filling out the form, click the "Add Connection" button to save the new connection. Calenderio will then do an initial sync of your events going back from 1 week to either 28 or 60 days in the future, depending on your plan.
⏰ Note: Calendar syncing runs in the background and can take up to 10 minutes to sync events. If you notice your events are not syncing right away, please wait at least 10 minutes and check again.
Sync your events with GetCalendario
Try out GetCalendario for 14 days for free, no credit card required!
Start syncing your events for free!Related Articles
If you enjoyed this article, these ones below may peak your interest as well!
How to authenticate a calendar account with Calenderio
Published under Guides on Jan 23, 2022
In this guide, we'll walk through how we can authenticate a calendar account (Google, Outlook, Exchange, iCloud) with Calenderio.
How to sync your personal calendar to your work calendar
Published under Guides on Jan 26, 2022
Learn how Calenderio can help save your time by automatically syncing your personal calendar events to your work calendar.
Common calendar terms
Published under Guides on Jan 20, 2022
A glossary of common calendar terms used throughout Calenderio, such as: Calendar, Source & Destination Calendars, Accounts, Calendar Providers, Connections & Chained Connections.

